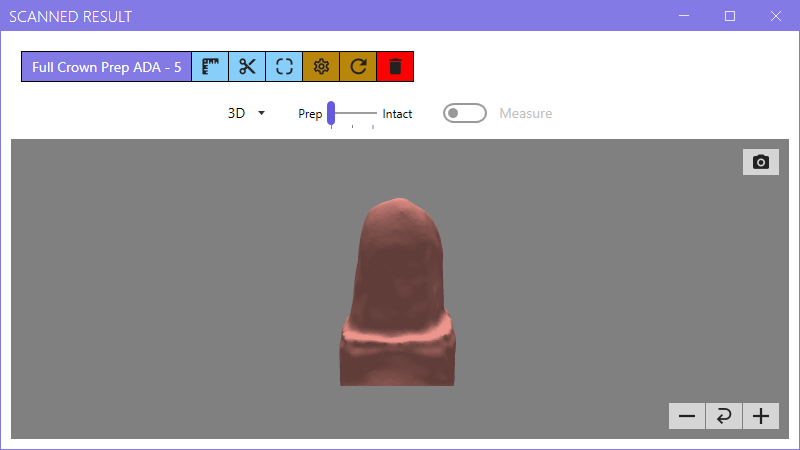
The scannned results dialog presents views of prep scans for specific course and
tooth selections.
Scanned Results Dialog Window
The scanned results window contains options for viewing and modifying tooth prep
scans.Figure 1. Scan Results Display by Course and Tooth Selection
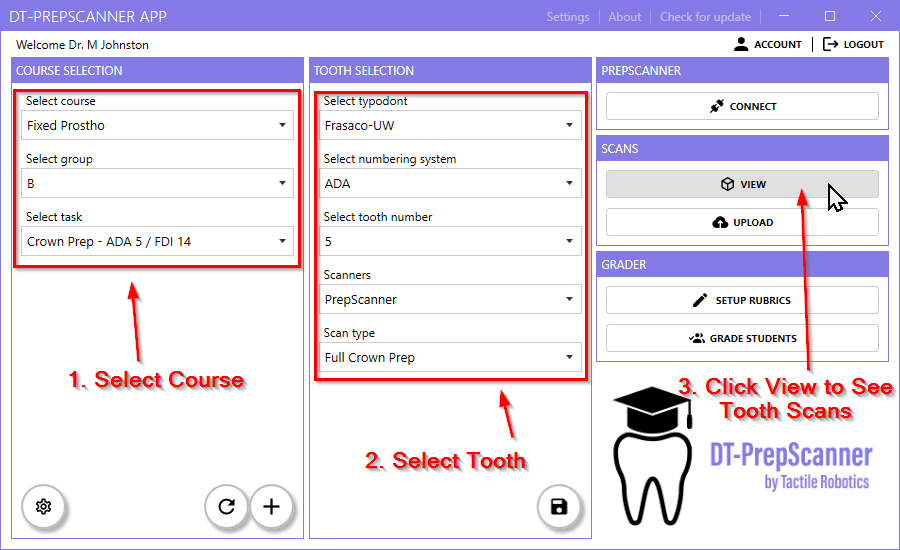
View Tooth Prep Scans
Scanned tooth preparations are displayed via the View option in the main app
SCANS section, based on the selected course and tooth. Figure 2. Tooth Prep Scan Display by Course and Tooth Selection
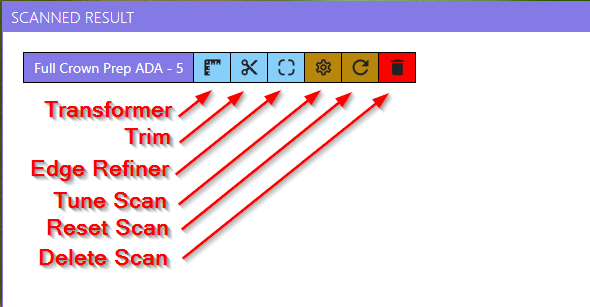
Scanned Results Menu Bar
The top menu bar provides the following scan manipulation choices
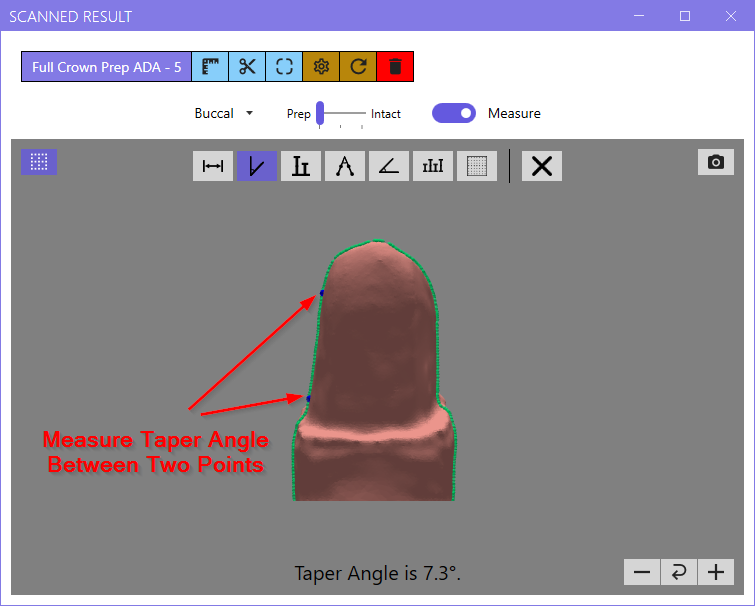
Transformer
Trim
Edge Refiner
Tune Scan
Reset Scan
Delete Scan
Figure 3. Scanned Results Menu Bar Options
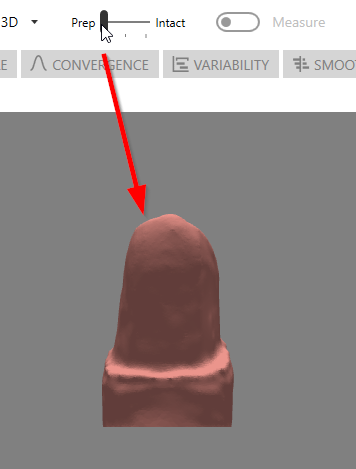
Prep Overlay View Options
Three overlay views are available:
Prep Only: Displays only the prepared tooth structure.Figure 4. Prep Only Overlay
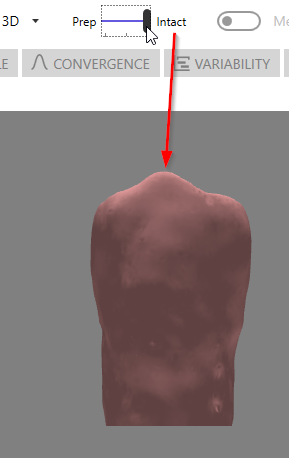
Intact Only: Displays only the unprepared (intact) tooth anatomy.Figure 5. Intact Only
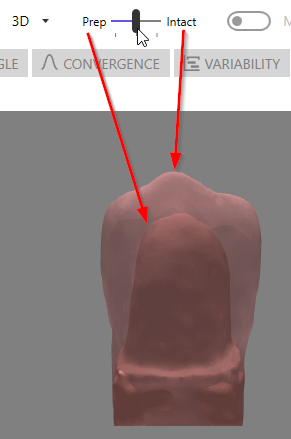
Prep + Intact: Displays both the prepared and intact structures in an
overlaid view for comparison.Figure 6. Prep + Intact View
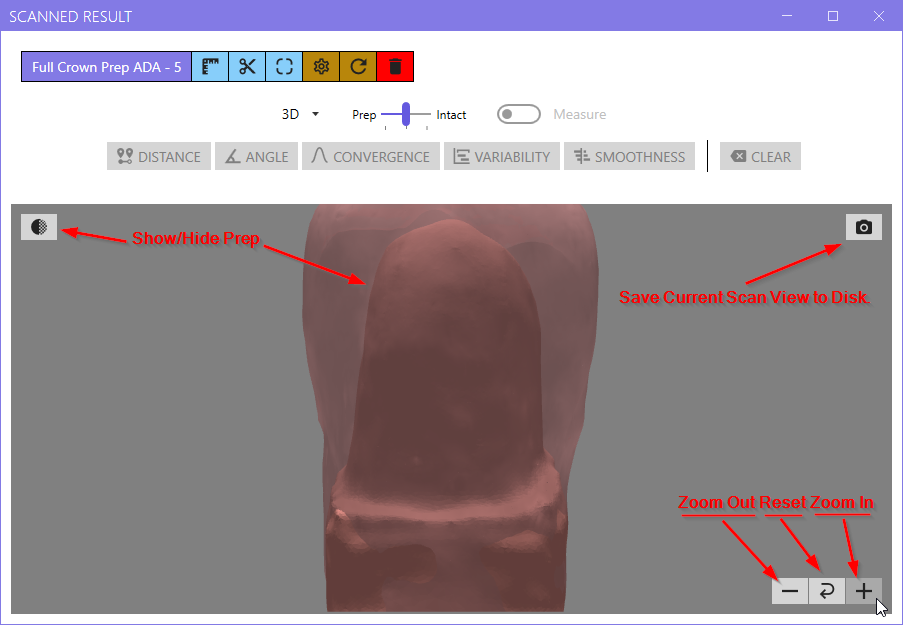
Prep View Window Controls
Viewing the tooth prep display can be adapted with window controls.
Zoom In
Zoom Out
Reset View
Save View to Disk
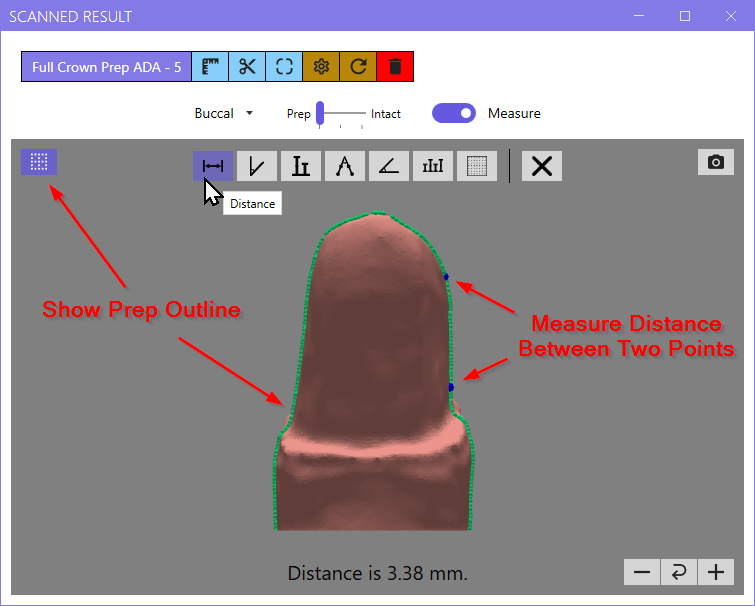
Show/Hide Prep
Figure 7. Tooth Prep Display Controls
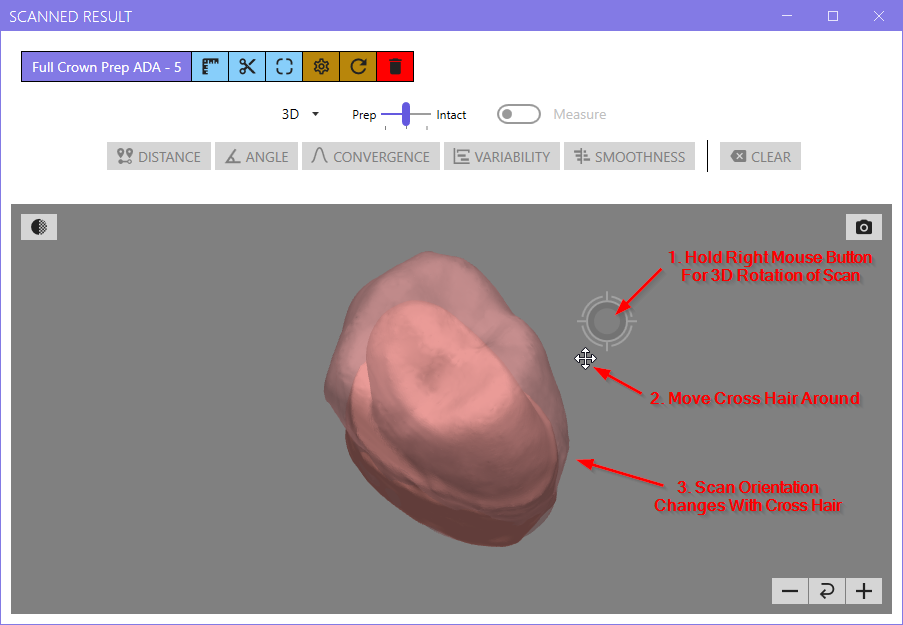
3D Scan Rotation Controls
The orientation of the 3D tooth prep model can be changed using mouse-based controls
within the SCANNED RESULT window.
Controls:
Right-click + drag: Rotates the scan in 3D space.
Crosshair movement: Adjusts the axis of rotation based on pointer
position.
Dynamic orientation: The model updates in real time as the crosshair
is repositioned.
Figure 8. 3D Scan Rotation Controls
Preset View Angles
Six preset views show the tooth preparation from different fixed anatomical angles.
Each view is described below.
3D: A free-rotating, interactive view of the entire tooth preparation
from any angle.Figure 9. 3D Preset View Angle
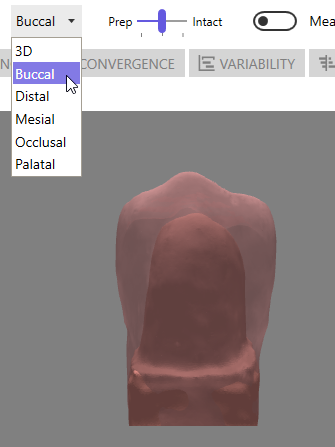
Buccal: Displays the tooth from the outer (cheek-facing) surface.Figure 10. Buccal Preset View Angle
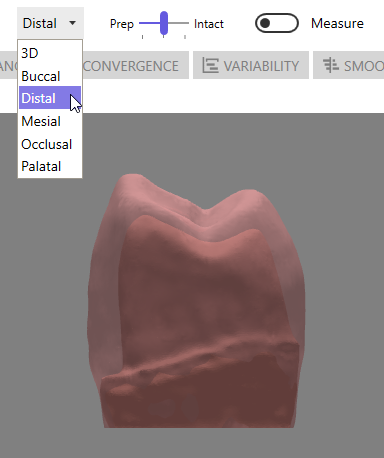
Distal: Shows the surface of the tooth farthest from the midline of
the dental arch.Figure 11. Distal Preset View Angle
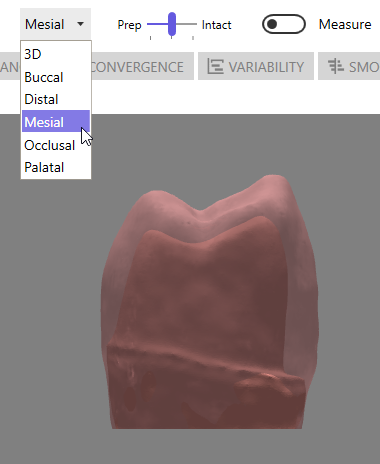
Mesial: Shows the surface closest to the midline of the dental
arch.Figure 12. Mesial Preset View Angle
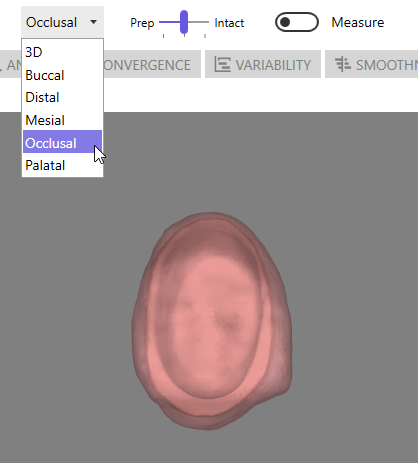
Occlusal: Displays the biting surface of the tooth, ideal for
assessing prep depth and outline.Figure 13. Occlusal Preset View Angle
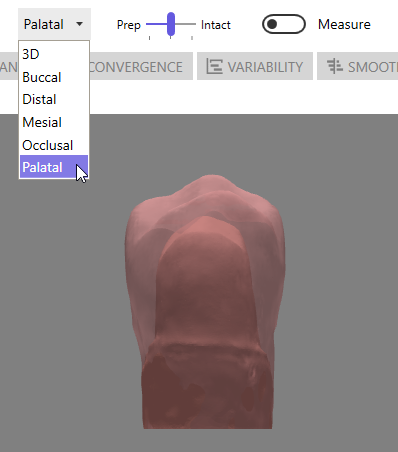
Palatal (or Lingual for mandibular, i.e., lower, teeth): Shows
the inner surface of the tooth facing the palate (upper teeth) or tongue
(lower teeth).Figure 14. Palatal Preset View Angle
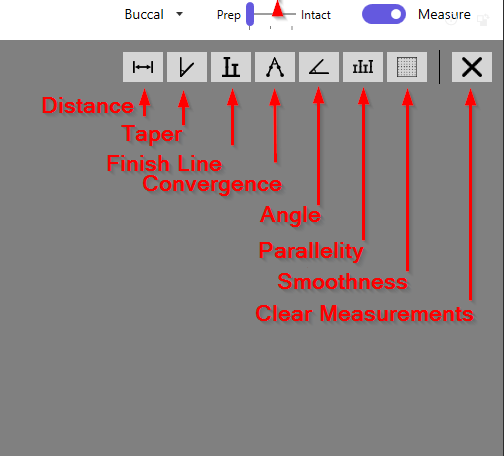
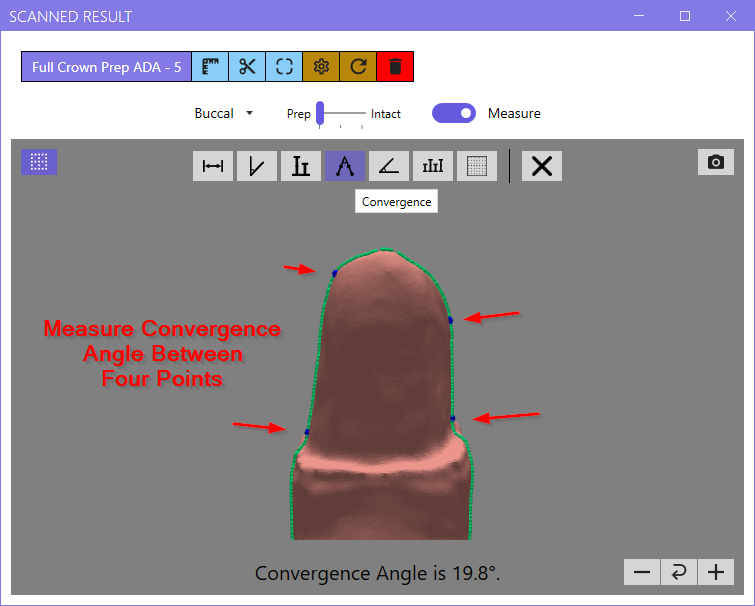
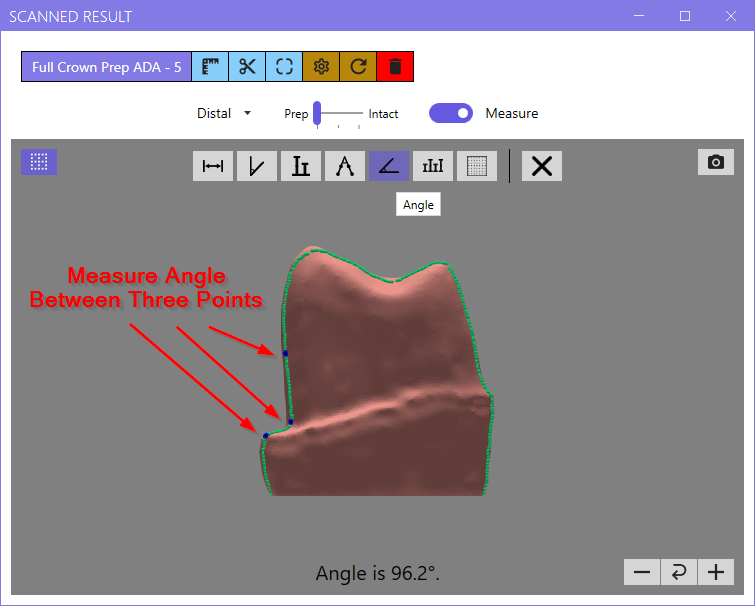
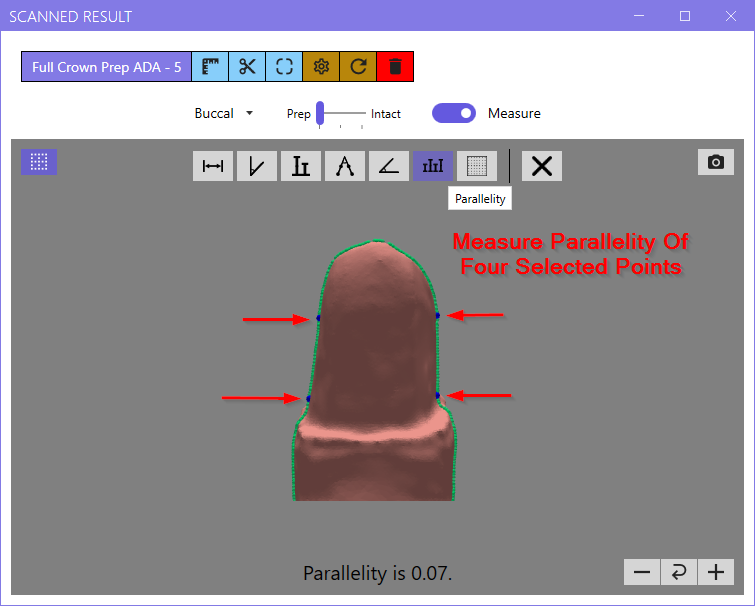
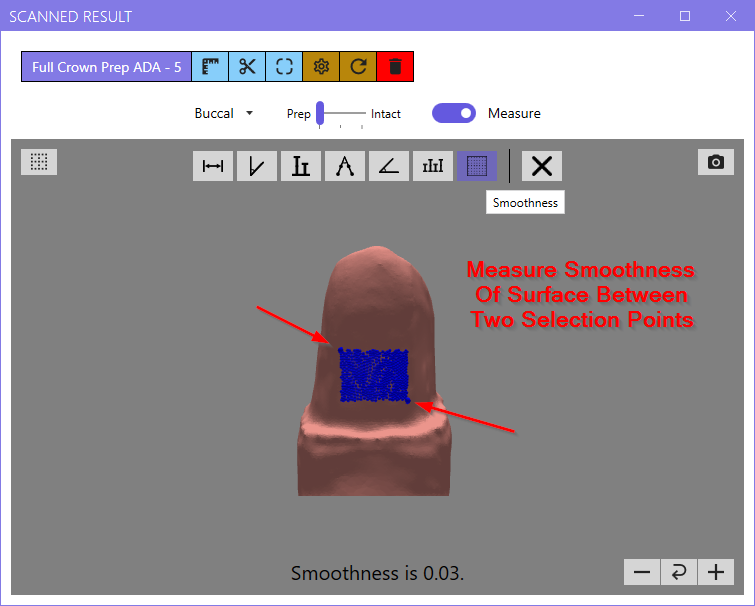
Prep Scan Measurement Tools
Seven measurement tools are available when using the Buccal, Distal,
Mesial, Occlusal, and Palatal preset views. These tools
become accessible upon activating the Measure toggle. Clear all active
measurements with the X button. Figure 15. Measurement Tools These tools are:
Distance – two measurement points. Figure 16. Distance Measure Tool
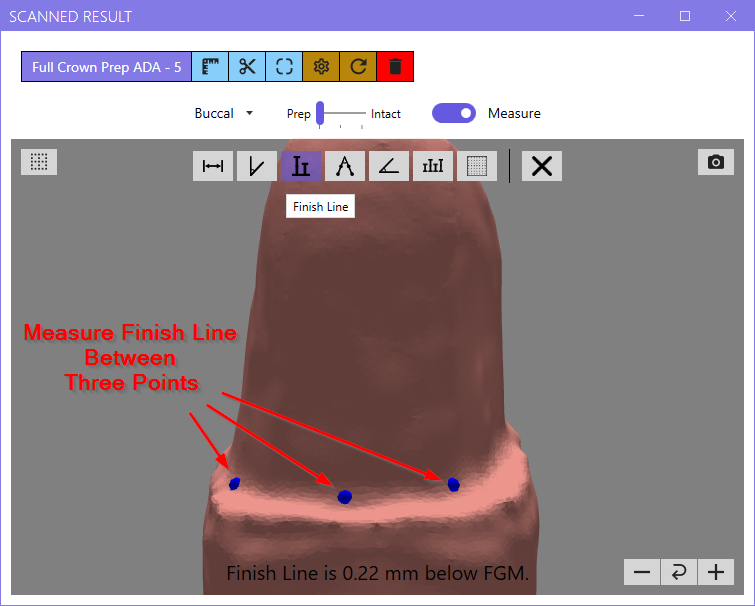
Finish Line – three measurement points. The finish line is the
boundary where the tooth preparation ends and the uncut tooth begins.
Free Gingival Margin (FGM) is the natural edge of the gum tissue
around the tooth.Figure 18. Finish Line Measure Tool